A single Atomic Host is a fine place to run your containers, but these hosts are much more fun when bunched into clusters, a task that we can manage with the help of Kubernetes.
There are a lot of great guides for setting up a kubernetes cluster, but my favorite involves ansible and vagrant, and lives in the kubernetes contrib repository on Github.
This install method can be used with the libvirt, virtualbox or openstack vagrant providers. You can also use the ansible scripts on their own, if vagrant isn’t your thing.
Prerequisites
To follow along, you’ll need a machine with vagrant and a provider for libvirt, virtualbox, or openstack. I typically use libvirt on Fedora, but I’ve had success with virtualbox on Fedora as well – if someone wants to test this with virtualbox and Windows or OS X, please let me know if it works.
I’m using Fedora 23, and this command pulled in the specific dependencies I needed:
dnf install -y vagrant-libvirt libvirt-devel gcc gcc-c++ ruby-devel python-netaddr git wget unzip libselinux-python ansible
For Fedora 22, which ships with an older version of vagrant (1.7.2), and for CentOS 7, which doesn’t have vagrant in its software repositories, you’ll need to install vagrant from the upstream package. And run vagrant plugin install vagrant-libvirt to get the libvirt provider.
The way that this Vagrantfile is currently written, you’re required to have the vagrant-openstack-provider installed, whether you’re using it or not, so either install it:
$ vagrant plugin install vagrant-openstack-provider
Or, comment out this line in the Vagrantfile:
require 'vagrant-openstack-provider'
If you do intend to use openstack, you’ll need to copy openstack_config.yml.example to openstack_config.yml and edit openstack_config.yml to include your own credentials and other details specific to your openstack cloud. You’ll need to upload one of the qcow2-formatted atomic images to openstack, as well, and specify that image by name in this config file.
DNS, kube-addons, and SELinux
One of the nice things about this method of bringing up a kubernetes cluster is that it configures the set of kubernetes addons, which includes DNS support. However, a major open issue with the DNS addon (and at least some of the others) is the way that it conflicts with SELinux. The ansible scripts take care of putting SELinux into permissive mode – a workaround I hope won’t be required for too long.
Get the code
I made a fork of the kubernetes contrib repo with a small set of changes to make atomic hosts work.
Mostly, the changes boil down to skip this step if you’re on an atomic host, but I’ve also modded the Vagrantfile to add support for setting a distro_type, so you can indicate whether you want to use Fedora Atomic (export DISTRO_TYPE=fedora-atomic), or CentOS Atomic (export DISTRO_TYPE=centos-atomic). The default in the script is CentOS Atomic.
Grab my fork by git cloning it or by downloading the zip archive:
$ git clone https://github.com/jasonbrooks/contrib.git
$ cd contrib/ansible/vagrant
$ wget https://github.com/jasonbrooks/contrib/archive/atomic.zip
$ unzip atomic.zip
$ cd contrib-atomic/ansible/vagrant
Bring up the cluster
We’ll use vagrant to bring up our kube-master and kube-nodes. The default number of nodes is 2, but you can change this by setting a different env variable for NUM_NODES.
$ vagrant up --no-provision --provider=libvirt
If your Atomic Host image needs updating, you can do it before provisioning, like this:
$ for i in {kube-node-1,kube-master,kube-node-2}; do vagrant ssh $i -c "sudo atomic host upgrade"; done
$ vagrant reload --no-provision
Time to configure kubernetes, by running the ansible playbook on the kube-master:
$ vagrant provision kube-master
Kubernetes should be all set up now.
Testing it out
I typically test out my kubernetes clusters by running the upstream project’s guestbook-go sample application, which features a simple front end app that runs across multiple hosts, and a redis-based backend that divides its work between a master node and a few slave nodes. I’ve packaged guestbook-go into an Atomicapp for ease of deployment:
$ vagrant ssh kube-master

$ mkdir guest && cd guest
$ sudo atomic run projectatomic/guestbookgo-atomicapp
Once the app is up and running, which you can discern by watching kubectl get pods, you can figure out the IP and port on which to access the app in your browser:
$ kubectl get pods --watch
NAME                 READY     STATUS    RESTARTS   AGE
guestbook-hv1cy      1/1       Running   0          1m
guestbook-nkkew      1/1       Running   0          1m
guestbook-w2urm      1/1       Running   0          1m
redis-master-4qr7s   1/1       Running   0          1m
redis-slave-3gvcn    1/1       Running   0          1m
redis-slave-btki8    1/1       Running   0          1m

$ kubectl describe nodes kube-node-1 | grep Addresses
Addresses:  192.168.121.66

$ kubectl describe service guestbook | grep NodePort
NodePort:       <unnamed>   32615/TCP
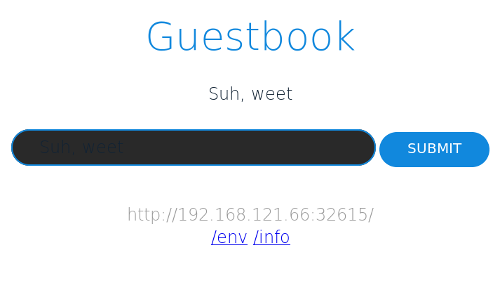
Based on the output above, you’d be able to reach your app at http://192.168.121.66:32615:
Next steps
I’m keen to see / help realize a fix for running SELinux in enforcing mode. Also, I’m working on getting my atomic-friendly changes merged upstream, so we won’t need to mess with a fork.