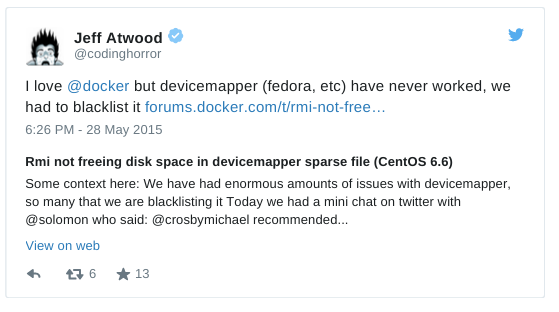
I’ve heard negative things about the Fedora|CentOS Docker storage configuration in the past, and while manning the Red Hat booth in San Francisco at DockerCon last week, I spoke to a number of people who’ve experienced these storage issues themselves.
Much of the trouble, I think, boils down to how Docker in Fedora and CentOS have shipped with a storage configuration that optimizes for a convenient getting started experience that can lead to inconvenience down the road.
I’ll cover how to reconfigure your Docker installation w/ better-performing storage, but first, a bit of background:
NOTE: Starting with docker-1.6.2-14.el7.centos.x86_64.rpm (released just a few days ago), CentOS 7 installs default to the better-performing device mapper storage configuration I describe below (yay!), and even appear to automatically handle the conversion from loopback to direct, so I’ll focus on Fedora 22 below.
As my colleague Jeremy Eder discussed in this blog post from October 2014, the AUFS backend that started out as Docker’s default storage option, but never made its way into the mainlain Linux kernel, posed a problem for Red Hat and our upstream first, no out-of-tree bits ways.
The settled-upon solution was device mapper thin provisioning, which takes a block storage device to create a pool of space that can be used to create other block devices for Docker containers and images. The device mapper backend can be configured to use direct LVM volumes or you can let Docker create a pair of loopback mounted sparse files to serve as the block devices.
The former option has required pre-planning – if you’re working from a typical single-drive laptop machine, you need to set aside some space for Docker at install-time, or you need to mess with partition-resizing. The latter option delivers, um, crap performance, and may or may not be to blame for various problems that Docker-using Fedorans or CentOSians have been encountering. The bug report referenced in the tweet above, for instance, involves this loopback file storage configuration, and that often seems to be the case with similar reports.
Fedora 22 Default Docker Storage Driver Setup

A lot of the Docker testing and poking I’ve done has occurred with an Atomic Host, and these hosts come preconfigured with the direct LVM configuration, and offer a handy utility, docker-storage-setup, that makes it easy to expand your storage as needed.
So, how do we take an existing Fedora system using the default-yet-not-recommended loopback file configuration, and switch, either to a direct LVM configuration or to something else that performs well without repartitioning our hard drive?
Both solutions involve rm -rf /var/lib/docker, which will blow away all the containers and images on your host, so keep your Dockerfiles handy or look into backing up and restoring your local images and volumes before proceeding.
Direct LVM
If you’re able to add another disk to your machine, it’s pretty easy to configure your Docker install for direct LVM volumes. I’m testing with a virtual machine, and my second disk is called /dev/vdb.
Start by installing the docker-storage-setup package:
# dnf install -y docker-storage-setup.noarch
Then, edit (create if needed) the file /etc/sysconfig/docker-storage-setup to point to your new disk device. In my case, I needed to add the line below:
DEVS="/dev/vdb"
Next, we need to stop the Docker service, delete /var/lib/docker (remember, this will blow away your containers and images), run the storage setup utility, and then start up the Docker service again:
# systemctl stop docker
# rm -rf /var/lib/docker
# docker-storage-setup
# systemctl start docker
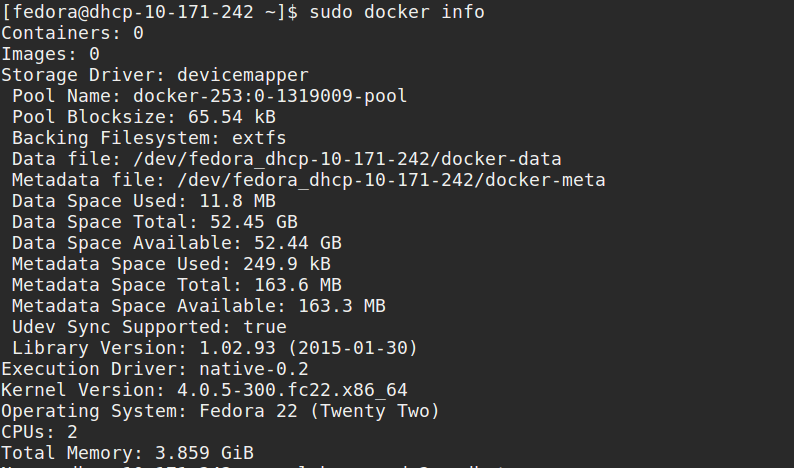
Running docker info should display your new, loopback file-free backend storage configuration:
Fedora 22 Atomic Default Docker Storage Driver Setup
OverlayFS
If you can’t easily add another disk to your Docker host – for instance, if you’re running Docker on your laptop – there’s another storage backend option available on Fedora and CentOS: OverlayFS.
Jeremy Eder discussed OverlayFS in his blog post from October, but at that time, this backend required a special Frankenkernel
and an experimental build of Docker. Now, however, OverlayFS support ships with the regular Fedora and CentOS kernels and Docker packages, and it’s super easy to set up.
While we’re past the Frankenkernels stage with OverlayFS, it’s considered a technology preview
in RHEL 7.1. One significant downside of OverlayFS, for now at least, is that it doesn’t play nice with SELinux, so we have to disable SELinux support within our containers – we can leave it enabled for the host itself. Additionally, there’s a reported issue (with workaround) involving OverlayFS and use of yum within containers.
First, we’ll stop the Docker service, and delete /var/lib/docker (again, this will blow away your containers and images).
# systemctl stop docker
# rm -rf /var/lib/docker
Then, we need to edit the file /etc/sysconfig/docker, and change the line OPTIONS='--selinux-enabled' to OPTIONS='--selinux-enabled=false', to disable SELinux within our containers.
After that, edit the file /etc/sysconfig/docker-storage to include the line:
DOCKER_STORAGE_OPTIONS= -s overlay
If there are any other lines that begin with DOCKER_STORAGE_OPTIONS, comment those out.
Finally, start up the Docker service again and run docker info to see your new storage backend in place:
# systemctl start docker
Fedora 22 Atomic Default Docker Storage Driver Setup

Till Next Time
I’ve tested these storage backend modifications in Fedora 22 and an CentOS 7, both with all updates applied. If you’re running older Fedora or CentOS installs, your mileage will vary, and I suggest you upgrade.
If you’re interested in helping improve the messaging around the loopback file default, or in helping smooth out the experience, check out this thread on the atomic-devel mailing list (from which I borrowed the headline for this post).
If you have questions or suggestions regarding this post, I’d love to hear them. Ping me at jbrooks in #atomic on freenode irc or @jasonbrooks on Twitter, or send a message to the Project Atomic mailing list. Also, be sure to check out the Project Atomic Q&A site.