Update: Removed links to Atomic Registry as discontinued.
The Project Atomic site has had a section dedicated to the Atomic Registry, which has been discontinued in favor of OpenShift Registry. It was useful for getting a registry up and running as quickly as possible. However, the software powering the quickstart installation has not always kept up with the OpenShift Origin software which powers the actual registry and web UI. This has lead to an increase in users reporting issues in the #atomic Freenode IRC channel. And often it ends with someone pointing to the stand-alone registry documentation that is provided by the OpenShift Origin project.
It turns out that deploying the stand-alone registry on a single Fedora 25 Atomic Host system is quite straight-forward and can quickly provide a usable registry. In this blog post, we’ll deploy a proof-of-concept stand-alone registry on a single node, which will end up using self-signed certificates in the process. In a later blog post, we’ll show you how to setup a stand-alone registry using multiple nodes and your own SSL certificates.
A good portion of this guide was lifted and adapted from Dusty Mabe’s excellent guide on installing OpenShift Origin on Fedora 25 Atomic Host. He also assisted me along the way with some questions, so most of the credit goes to him for figuring out the hard stuff!
Environment
For the purposes of this guide, we are going to deploy a stand-alone registry using the ‘all-in-one’ topology, where we host all the components on a single system. The OpenShift Origin docs have some hardware requirements for this kind of install; they seem rather generous, so you might be able to get away with a less powerful system. As with most things, your mileage may vary.
In addition to your dedicated system for the registry, you’ll also need to have Ansible 2.2 installed on your workstation (or wherever you choose to run the Ansible-based installer).
Once your Fedora 25 Atomic Host system has been provisioned, make sure it is upgraded to the latest version by using the atomic host upgrade command.
Additionally, I decided I would configure Docker to use the overlay2 storage driver for my install. This is completely optional, but if you decide to make this change you can use the instructions in a previous blog post to do so.
Prepping the Installer
OpenShift Origin provides an excellent Ansible-based installer that we will used to deploy the registry. So the first thing to do is checkout the installer from the GitHub repo. At the time of this writing, I used a specific version (3.4.24-1) of the repo to ensure it would work correctly for me. We’ll checkout the repo to that version as part of this process.
$ git clone https://github.com/openshift/openshift-ansible.git
$ cd openshift-ansible
$ git checkout openshift-ansible-3.4.24-1
HEAD is now at 90f6a70... Automatic commit of package [openshift-ansible] release [3.6.24-1].
The next step is to prepare the inventory file for the installer. My dedicated system for the registry has a 'public’ IP address of 10.8.172.199, so we use that value throughout. (I’m using a VM in a private OpenStack instance, so the 'public’ IP address is only visible on our corporate network and is not reachable from the Internet.)
Notice how I am using the xip.io service as part of my openshift_master_default_subdomain value. It provides wildcard DNS resolution for any IP address you want to use. This is a handy solution if the system you are using does not have a DNS resolvable hostname.
# Create an OSEv3 group that contains the masters and nodes groups
[OSEv3:children]
masters
nodes

# Set variables common for all OSEv3 hosts
[OSEv3:vars]
ansible_user=cloud-user
ansible_become=true

openshift_master_default_subdomain=10.8.172.199.xip.io

openshift_deployment_type=origin
openshift_release=v1.4.1
deployment_subtype=registry
containerized=true

# enable htpasswd auth
openshift_master_identity_providers=[{'name': 'htpasswd_auth', 'login': 'true', 'challenge': 'true', 'kind': 'HTPasswdPasswordIdentityProvider', 'filename': '/etc/origin/master/htpasswd'}]
openshift_master_htpasswd_users={'admin': '$apr1$zgSjCrLt$1KSuj66CggeWSv.D.BXOA1'}

# host group for masters
[masters]
10.8.172.199

# host group for worker nodes, we list master node here so that
# openshift-sdn gets installed. We mark the master node as not
# schedulable.
[nodes]
10.8.172.199 openshift_node_labels="{'region': 'infra', 'zone': 'default'}" openshift_schedulable=true
This inventory is very similar to the one used in Dusty’s blog post about installing OpenShift Origin, so I’m just going to highlight some of the changes I made.
- Dropped the specification of the
etcdnodes - Added the
deployment_subtype=registryentry - Dropped the creation of the
userusername - Skipped the usage of the
openshift_public_hostnameandopenshift_hostnamevariables - New values for
openshift_node_labelsandopenshift_schedulablevariables
The most important changes (which are also mentioned in the OpenShift Origin documentation) are the addtion of the deployment_subtype and openshift_schedulable variables.
The deployment_subtype variable instructs the installer to just install the pieces of OpenShift Origin necessary for the stand-alone registry. Additionally, the openshift_schedulable variable allows the single node to be used to run pods.
Run the Installer
We are ready to feed the inventory file to ansible-playbook and run the installer. We have to use the same workaround mentioned in Dusty’s blog post to enable Ansible to use Python3 during execution.
$ ansible-playbook -i myinventory playbooks/byo/config.yml -e 'ansible_python_interpreter=/usr/bin/python3'
...
...
PLAY RECAP *********************************************************************
10.8.172.199               : ok=567  changed=130  unreachable=0    failed=0
localhost                  : ok=9    changed=0    unreachable=0    failed=0
Running the installer will take a few minutes, but once it finished, we can get right to the registry console.
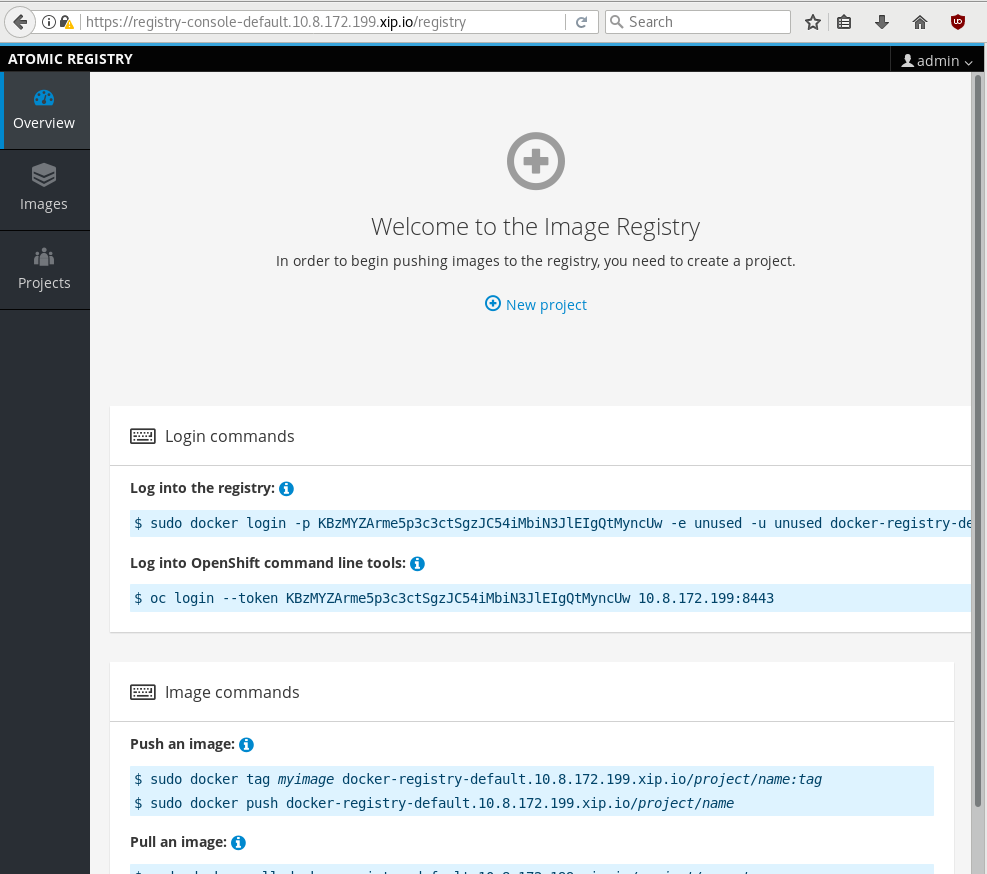
Assuming you have used a similar value for openshift_master_default_subdomain, you’ll be able to access your registry console at a URL similar to https://registry-console-default.10.8.172.199.xip.io/. Just append registry-console-default. to the value of openshift_master_default_subdomain.

As mentioned earlier, we used a self-signed certificate for the registry console, so you will have to instruct your browser to accept the certificate when you access the console.
The inventory file we used defined an admin user with the password OriginAdmin and we can use that right away to login.
Next Steps
With the admin user, I can immediately create a new project and start pushing images to the registry. In the image below, I’ve created the test project.
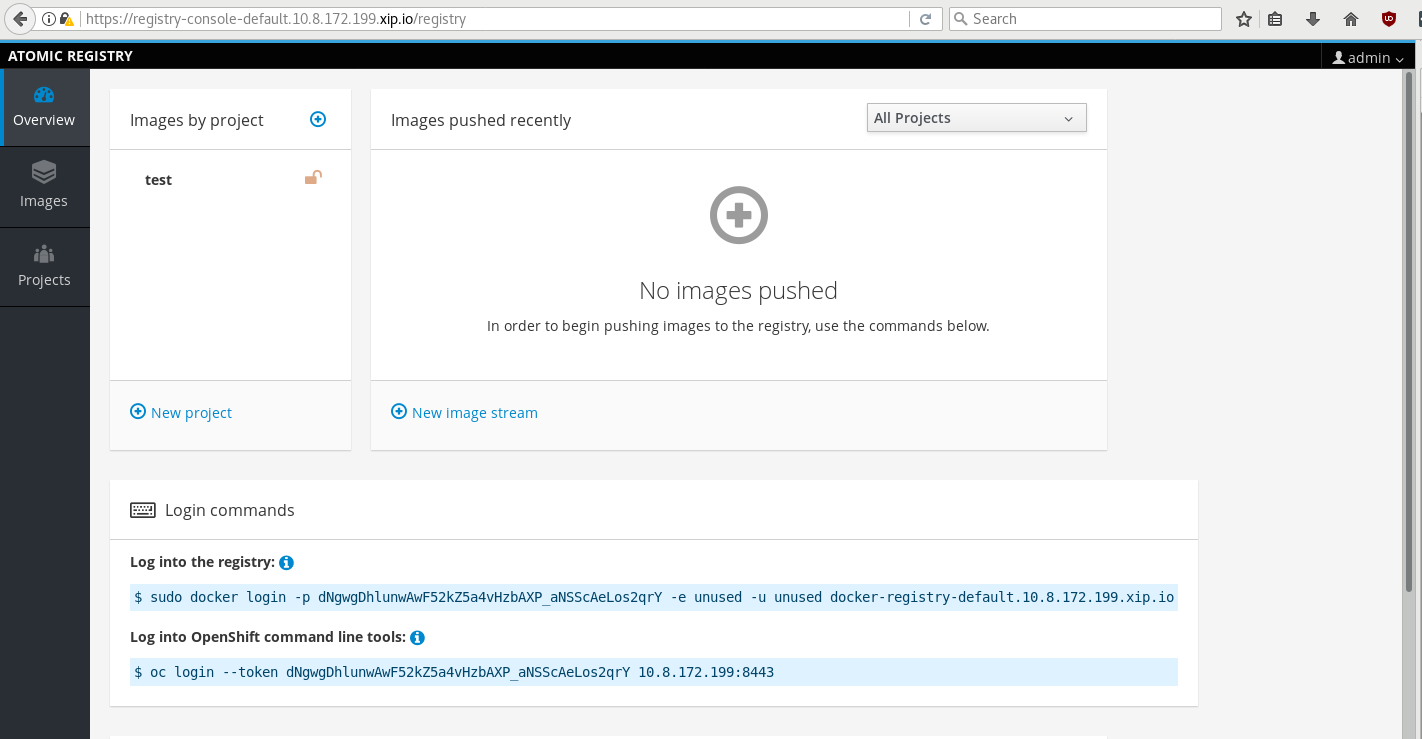
Because the registry is using a self-signed certificate, I need to configure my local Docker daemon to recognize the registry as an insecure registry. This means adding --insecure-registry docker-registry-default.10.8.172.199.xip.io to the INSECURE_REGISTRY field in /etc/sysconfig/docker and then using systemctl restart docker to restart the daemon.
After that, I can use the docker login command supplied by the registry console to login to the Docker registry and be granted access to push images. In the example below, I’m just pushing a Fedora base image to the registry.
$ sudo docker login -p dNgwgDhlunwAwF52kZ5a4vHzbAXP_aNSScAeLos2qrY -e unused -u unused docker-registry-default.10.8.172.199.xip.io
Flag --email has been deprecated, will be removed in 1.13.
Login Succeeded
$ sudo docker images
REPOSITORY                          TAG                 IMAGE ID            CREATED             SIZE
registry.fedoraproject.org/fedora   latest              917d6b21e974        6 weeks ago         230.6 MB
$ sudo docker tag registry.fedoraproject.org/fedora:latest docker-registry-default.10.8.172.199.xip.io/test/fedora:latest
$ sudo docker push docker-registry-default.10.8.172.199.xip.io/test/fedora:latest
The push refers to a repository [docker-registry-default.10.8.172.199.xip.io/test/fedora]
ae934834014c: Pushed
latest: digest: sha256:1c28fa233b9e00f24a9b782752032648bdbf748ef1c29af24a5621691d9460ad size: 3153
Immediately in the registry console, I can see the newly pushed image.

And for grins, let’s see if we can push an image to the registry using the atomic command, which utilizes skopeo for the push operation. We’ll push the CentOS base image in this example.
$ sudo docker images
REPOSITORY                                                TAG                 IMAGE ID            CREATED             SIZE
registry.centos.org/centos/centos                         latest              5d7f51b6d39a        5 weeks ago         192.5 MB
docker-registry-default.10.8.172.199.xip.io/test/fedora   latest              917d6b21e974        6 weeks ago         230.6 MB
registry.fedoraproject.org/fedora                         latest              917d6b21e974        6 weeks ago         230.6 MB
$ sudo docker tag registry.centos.org/centos/centos:latest docker-registry-default.10.8.172.199.xip.io/test/centos:latest
$ sudo atomic push --type atomic docker-registry-default.10.8.172.199.xip.io/test/centos:latest
WARN[0000] '--tls-verify' is deprecated, please set this on the specific subcommand
Copying blob sha256:36018b5e978717a047892794aebab513ba6856dbe1bdfeb478ca1219df2c7e9c
190.83 MB / 190.83 MB [=======================================================]
Writing manifest to image destination
Storing signatures
Again, we can see the image immediately show up in the registry console.
